Research
The aim of your industry research is to demonstrate your own awareness of how the techniques and technologies available to stop Motion animators have changed over time.
Discussing this development in your own words allows your to demonstrate your ability to talk about animation using technical terms (eg frame, frame rate, illusion of movement, sequence, green-screen, lip sync, phoneme, puppet, armature, claymation, paper-cut, CGI,) your awareness of how Stop Motion has been used commercially in the past, and the arguments for using it to produce creative work today.
If you were to pitch your idea to a record label for funding today, you would need to show the though behind your decision to use this technique - this gives you an opportunity to practice doing this.
Though you must present these ideas in your own words, using screen grabs, links to clips on youtube and quotes will help to give your ideas more weight and interest.
Sequence Ideas
Your presentation of your sequence ideas should make it clear what you intended to animate and how you intend to use specific techniques to do this. Using screen grabs and/or links to your own experiments or other peoples animations can help make this clear and interesting.

WAC DigiArts
Monday, 26 March 2018

Monday, 26 February 2018
Stop Motion Assignment Guide
Below is a link to a PDF guide for this assignment. It takes you through the work step by step with lots of links and examples to help you.
Assignment Guide PDF
Lesson Objective: Be able to generate ideas for stop motion animation in response to a piece of music.
For session 1 Today your tasks are:
Decide on the track which you will be working to AND introduce it on a "sound track" slide.
Brain storm sequence ideas in relation to this track. Note them down on a "Sequence Ideas" slide.


Assignment Guide PDF
Lesson Objective: Be able to generate ideas for stop motion animation in response to a piece of music.
For session 1 Today your tasks are:
Decide on the track which you will be working to AND introduce it on a "sound track" slide.
Brain storm sequence ideas in relation to this track. Note them down on a "Sequence Ideas" slide.


Monday, 5 February 2018
Questions
Q - When was the first documented stop moon made and who by?
Q -Name two early pioneers of stop motion animation bonus points ..
Q - Which decades are often described as the ‘golden era’ of stop motion and why?
Q -Why did stop motion production drop off sharply in the 90’s? - rise of computing and CGI
Q - Which technologies have since led to a resurgence in the creation of stop motion animation?
Q - In your opinion what are the creative +/- of Stop Motion vs CGI? - just looking for considered argument...
Sunday, 4 February 2018
Industry Context: Development of the Stop Motion Animation Industry
Pass 1 Describe the techniques and development of stop motion animation with some appropriate use of subject terminology
Merit 1 Explain the techniques and development of stop motion animation with reference to detailed illustrative examples and with generally correct use of subject terminology.
Distinction 1 Comprehensively explain the techniques and development of stop motion animation with elucidated examples and consistently using subject terminology correctly.


For the first assessed part of this unit you will need to come up with treatment for your own collection of animated clips. As part of this you are required (by the examiners) to demonstrate your knowledge of the way in which the Stop Motion industry has developed. The assessment criteria for this element of your project work are above.
Objective: Be able to discuss the development of the Stop Motion Animation Industry using relevant examples.
Task 1: Working in teams, research the 6 stop motion topics below.
Task 2: Take part in group quiz on these topics - make notes/recordings of any extra information that you feel would be useful.
Task 3: Complete your own write up on the “Development of the Stop Motion Industry” using the Quiz questions to help you. Use links to Stop Motion sequences to illustrate key points.
(To be completed by next session as homework if necessary)


Merit 1 Explain the techniques and development of stop motion animation with reference to detailed illustrative examples and with generally correct use of subject terminology.
Distinction 1 Comprehensively explain the techniques and development of stop motion animation with elucidated examples and consistently using subject terminology correctly.


For the first assessed part of this unit you will need to come up with treatment for your own collection of animated clips. As part of this you are required (by the examiners) to demonstrate your knowledge of the way in which the Stop Motion industry has developed. The assessment criteria for this element of your project work are above.
.......................................................................................
This session will help you collect the information that you need.
Objective: Be able to discuss the development of the Stop Motion Animation Industry using relevant examples.
Task 1: Working in teams, research the 6 stop motion topics below.
Task 2: Take part in group quiz on these topics - make notes/recordings of any extra information that you feel would be useful.
Task 3: Complete your own write up on the “Development of the Stop Motion Industry” using the Quiz questions to help you. Use links to Stop Motion sequences to illustrate key points.
(To be completed by next session as homework if necessary)
Stop motion topics to research in ahead of the quiz:
- How & when stop motion began.
- Early (pre 1950’s) Pioneers of stop motion.
- Stop Motions ‘Golden era”.
- Rise of CGI.
- Resurgence of stop motion.
- Creative arguments for stop motion vs CGI.

The Evolution of Stop Motion Animation
Stop Motion Animation : A History


Sunday, 28 January 2018
Stop Motion Animation Session 3: Lip Sync
Learning Objective for this session:
LO1: Work collaboratively to produce a Lip Sync animation.
LO1: Work collaboratively to produce a Lip Sync animation.
In Animation 'Lip Sync' is the process of fitting character mouth movements to pre-recorded dialogue.
One of the founding fathers of modern animation, Disney animator Preston Blair developed a system of ‘phoneme’ mouth shapes which could be used to create the appearance of speech.
Today we will be using a simplified version of the 'Preston Blair' system based on the shapes used by Nick Park (Aardman).
Task 1:
Work together to create a set of plasticine mouth shapes using the reference sheet provided.
Advice: As you make the shapes, place them on a sheet of paper, and write the corresponding phonemes below, take a reference photo when complete.
Task 2:
Use the Step by Step guide below to create your own short lip sync animation.
Task 3:
Upload the project file & exported movie to your G-drive - share the movie with me (jane.maxwell@wac.co.uk).


Link to Step By Step Guide:
Monday, 22 January 2018
Unit 33 Stop Motion Animation Production Session 1: Tech Intro
Animation [Definition] Creating the illusion of life and movement.
Your challenge this term is to create a bank of stop motion clips suitable for performance (using Serato video) against a piece of music (preferably your own).
This session you will start by getting to know the Stop Motion Studio Pro app as you experiment with ways to bring movement to your own characters.
Session Objective:
Be able to use the Stop Motion Studio Pro app to create character movement.
Task 1:
Working in a small group / pair experiment with use of the Stop Motion Studio Pro app to create at least three different types of character movement.
(Tip: depending on the stability of your character model you may prefer to use the model standing - for more freedom / lying down for more stability)
Task 2:
Sign into your G-drive and upload your sequences as project files AND finished clips.
Stop Motion Music Clip Examples...
Your challenge this term is to create a bank of stop motion clips suitable for performance (using Serato video) against a piece of music (preferably your own).
This session you will start by getting to know the Stop Motion Studio Pro app as you experiment with ways to bring movement to your own characters.
Session Objective:
Be able to use the Stop Motion Studio Pro app to create character movement.
Task 1:
Working in a small group / pair experiment with use of the Stop Motion Studio Pro app to create at least three different types of character movement.
(Tip: depending on the stability of your character model you may prefer to use the model standing - for more freedom / lying down for more stability)
Task 2:
Sign into your G-drive and upload your sequences as project files AND finished clips.
Stop Motion Music Clip Examples...
"Butter Ya'Self" Directed by Julian Petschek
"Don't Get Captured" Directed by Chris Hopewell
"Fell In Love With A Girl" Directed by Michel Gondry
Read more: http://www.mtv.com/news/1457127/vma-lens-recap-the-story-behind-white-stripes-fell-in-love/
"Ready, Able" Directed by Alison Schulnik"
Wednesday, 17 January 2018
Unit 33: Stop Motion Animation
For the next unit we will be exploring stop motion animation techniques.
As you explore these techniques you will put together a bank of your own animated clips.
At the end of the project you will use these clips as assets to play out alongside a piece of your own music using the Serato Video set up.
Research Starter Task:
Build your awareness of stop motion by creating a research page of examples which you find interesting. To make these relevant to your project your should especially look out for:
- Stop motion music videos
- Claymation special effects
- Stop motion characters animations
Stop motion examples on the Digi Arts Blog
https://wacdigiarts.blogspot.co.uk/2017/01/unit-33-stop-motion-animation.html
Monday, 15 January 2018
Evaluating your final Graphic Narrative work
To complete your Graphic Narrative Unit and gain a Pass/Merit/Distinction overall your need to evaluate your final piece. Below is the evaluation assessment criteria for Merit:
M3 "Explain own graphic narrative work with reference to detailed illustrative examples* and with generally correct use of subject terminology**"
*This means that within your evaluation you need to offer reasons for the creative choices that you've made e.g character design, storyline, graphic style etc; and back up these reasons with ether examples of other published comic book etc AND/OR feedback from your audience.
**As you write you also need to use appropriate media terms where you can ( Eg Protagonist/Antagonist, Supporting Characters, Storyline, Narrative Structure (linear,non-linear, open/closed etc) Foreground/Background, Longshot/Mid Shot/ Close up. Target Audience etc).
Evaluation Step by Step Guide:
1) When you have finished your layout export it as a PDF file - you will be able to share this with your target audience.
2) Use google 'forms' to create an audience feedback questionnaire. This is an easy way to collect data which you can use to support points in your evaluation.
3) When making your questionnaire think carefully what you want to find out (e.g do people understand certain aspects of the story?, Do certain aspects of the visual style create the atmosphere that you wanted? etc) and chose the answer type from the drop down menu.
4) Remember to insert a copy of your final layout at the top of your questionnaire so that the audience can look at it first!
5) Send it out to at least 5 relevant people.
5) Use screen grabs/quotes from your feedback / examples from your initial research to help you discuss the +/- of your final piece.
Below are Questions to help you structure your evaluation:
- What genre of Graphic Narrative narrative did you set out to produce and who was the target audience?
- To what extent do you feel you managed to meet the conventions of this genre eg achieve a look and feel similar to other published examples?
- To what extent did you audience understand the genre that you were aiming for?
- What were the biggest creative challenges that you found during the production process and how did you overcome them?
- Which aspects of the character design / graphic styling did you receive positive feedback on?
- Did you make any adjustments to your original plan as you worked in order to improve the characters or storyline?
- What would you do differently in terms of styling of technique in future?
Monday, 8 January 2018
Assignment 1 Completion: Putting together a well designed Creative Treatment.
[Adam, Amir, Dior, Chris, Riel, Nathan, Zee]
Session objective: Be able to present ideas for an Original Graphic Narrative as a carefully designed pitch document.
Session objective: Be able to present ideas for an Original Graphic Narrative as a carefully designed pitch document.
Final hand in hand in is this Wednesday.


Industry example of pages from a Creative Pitch for document for a game.
All pages are designed to reflect the visual style of game while also presenting the creative content.
Below is a quick reminder of the brief:
Produce a clear and CAREFULLY STYLED* presentation (powerpoint etc) describing your idea for a Graphic Narrative. This should include:
- A front cover page with the tile of your Graphic Narrative, Unit name/number and your name.
- Story outline
- Character Designs & descriptions
- Examples of background imagery / settings for story.
- Market research into other comparable Graphic Narrative products aimed at a similar audience. This should include comparison of how your product aims to mirror/contrast existing products. AND links to the research sources which you have used.
- Details of resources needed for production (e.g. construction materials, equipment etc).
* CAREFULLY STYLED. A Creative Treatment is presentation used in industry to pitch for funding. Your presentation should make use of background imagery, colours, fonts etc to present your Graphic Narrative idea in an exciting way. Overall the presentation should have visual style that suits your theme and audience.
Assignment 2 Completion: Making a customised layout in ' Comic Life'
[Akram, Brandon, Daniel, Dante, Courtney, Oscar, Titus]
Session Objective: Be able to create a Comic Book layout customised to fit the style of your imagery using the "Comic Life' app.
This session your mission is to use 'Comic Life' to create a layout for your graphic narrative.
The Comic Life app offers some basic templates which you can customise to create something original styled to fit your theme and imagery.
Below are before and after examples. The app allows you to customise colours, fonts, callouts etc. Colours can be sampled from your imagery to create a more professional looking outcome.

Original Template

Customised Version
WHAT TO DO:
1) Collect together your imagery in a folder on your G-drive. Even if you have a couple of images left to take begin work on layout so that you can be sure of what you still need.
2) To give your images a more graphic feel you can download them to an Ipad and use the 'Vinci' app to stylise your imagery using a suitable filter. Images will be saved to 'photos' on the Ipad - you can then save them back to your G-drive.
3) Working on a Laptop - download your images from the G-drive to your desktop (filtered version if relevant)
4) Open the Comic Life app and choose a suitable template to start with. I used the 'superhero' template as my starting point for the version above.
5) Drag and drop your images into the boxes. You can cut, paste and re-size boxes as needed to create your basic story layout. Customise the basic template to create an original design. Click on header lettering once to change the font, double click to re-shape or distort (red dots will appear which you can then drag to re-shape).
6) SAVE YOUR TEMPLATE REGULARLY AS YOU WORK ON IT!! Back up your layout by saving the comic life file to your G-drive at the end of the session. When it's finished export your layout as a PDF and save this to your G-drive as well.
Monday, 4 December 2017
Producing & refining your imagery
Well done for some excellent character design
& photography work today :)
Once you have photographed the scenes of your storyboard you can add further comic book styling to your images if you want to using the Vinci or Photoshop filters on the Ipads.
To do this, sign in to your drive, save your images to the camera roll then open up the either of these apps and try applying different filters. When you find one that suits your theme and target audience you can then apply this to all your imagery.
Using apps is a design choice so thin carefully about it, can hep to further blend the 3D character with the printed background... below are some examples of your images treated with different Vinci filters


Left: "hellgun" / Right: "blood"


Left: "transverse" / Right "times"


Left: "mars" / Right: "Vendetta"
Project Development Tasks
Akram, Daniel, Titus, Courtney, Oscar, Dante.
Use careful lighting and character placement to photograph your characters against the printed backgrounds as planned out on your storyboard. Think carefully about angles and shot types e.g close up/mid shot/long shot - from above/below/straight on etc... Below are some examples of Akram's character shot from different angles..


Chris, Ze, Dior, Adam
Task 1: Collect together the ideas and research that you have produced for Assignment 1 into a PowerPoint / Keynote 'Creative Treatment'. A 'Creative Treatment' is a carefully styled presentation which is used in industry to pitch an idea to potential funders.
Below is a link to an example of a Creative Treatment for an animation from a past student. This is just to give you an idea of the way in which the presentation should be given a style throughout which reflects the theme. For example, you could use images or textures from the kinds on locations that you narrative will be set in as backgrounds. Think carefully about your choices of colours and fonts to fit your theme - your logotype (produced for task 1) can be used on the front slide and also those about character design.
Link to past student's Creative Treatment example
Task 2:
Begin work on a character model - you will photograph this against a suitable background to create character design imagery for your [presentation.
Tuesday, 28 November 2017
Wednesday 28th : Preparation for sharing & project finalisation.
Year 1 - ALL - Quick Design Task
Task 1: Using free front site "www.dafont.com" create a logotype for your Graphic Narrative. This will enable you to add another element to the design part of your presentation for Assignment 1 and also to go beyond the limited font options within the Comic Life layout program when you come to put your narrative togther.
HOW TO:
First, use the search box in the top righthand corner of the site to search for fonts using keywords such as "zombie" or "Hip Hop" or visual terms such as "bubble writing".Next, type the title of your Graphic Narrative "Zombie Land" into the 'preview' box, set the size to 'large' and click 'submit'.
Finally, screen grab (cmd/shift/4) any that you like and use this asset within yourAssignment 1 presentation and also Graphic Narrative layout.

Below are a some examples applied to photos of your characters.
(I've used the 'Instant Alpha' function in keynote to remove the white background and given the image a coloured border to make it stand out. You could also easily remove the background and re-colour the font in PS)


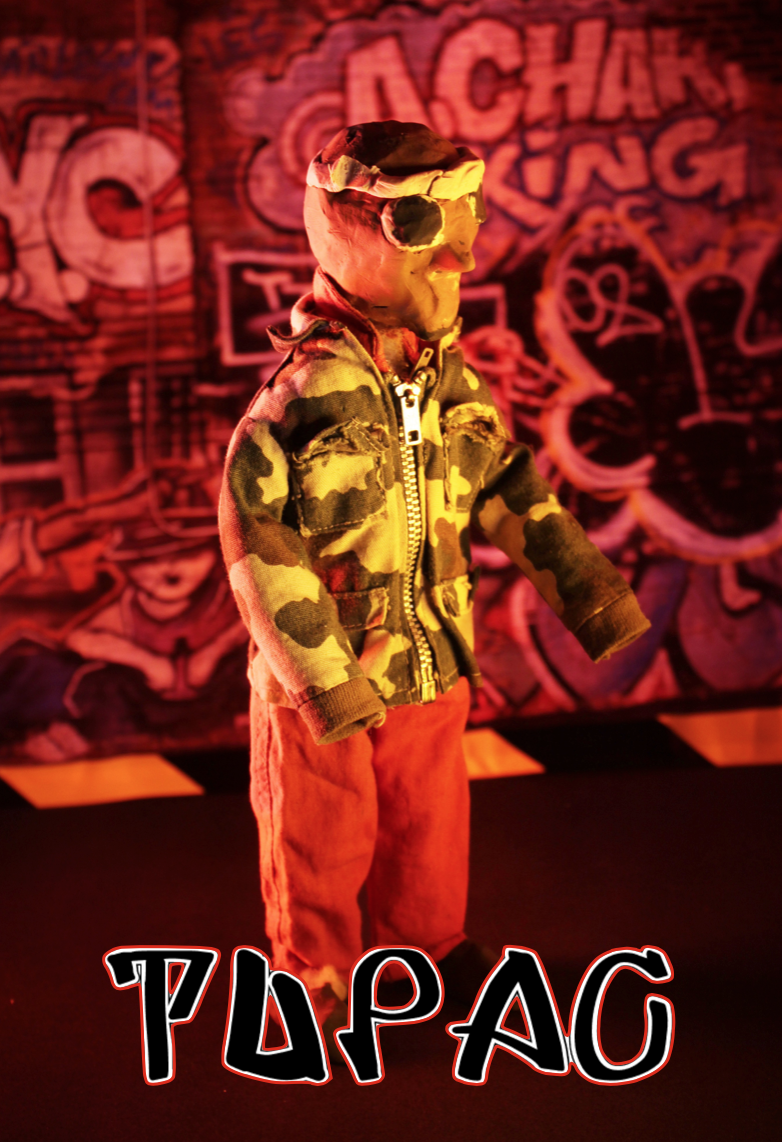


Project Development Tasks
Akram, Daniel, Titus, Courtney, Oscar, Dante.
Task 2a: Find, resize and print backgrounds needed to photograph the frames planned out on your storyboard.
Easy guide to resizing your images to use as backgrounds.
Task 2b: Use careful lighting and character placement to photograph your characters against the printed backgrounds as planned out on your storyboard. Think carefully about angles and shot types e.g close up/mid shot/long shot - from above/below/straight on etc... Below are some examples of Akram's character shot from different angles..
Chris, Ze, Dior, Adam
Task 2: Collect together the ideas and research that you have produced for Assignment 1 into a PowerPoint / Keynote 'Creative Treatment'. A 'Creative Treatment' is a carefully styled presentation which is used in industry to pitch an idea to potential funders.
Below is a link to an example of a Creative Treatment for an animation from a past student. This is just to give you an idea of the way in which the presentation should be given a style throughout which reflects the theme. For example, you could use images or textures from the kinds on locations that you narrative will be set in as backgrounds. Think carefully about your choices of colours and fonts to fit your theme - your logotype (produced for task 1) can be used on the front slide and also those about character design.
Link to past student's Creative Treatment example
Monday, 27 November 2017
Monday 27th Project Finalisation Workshop: Groups A & B
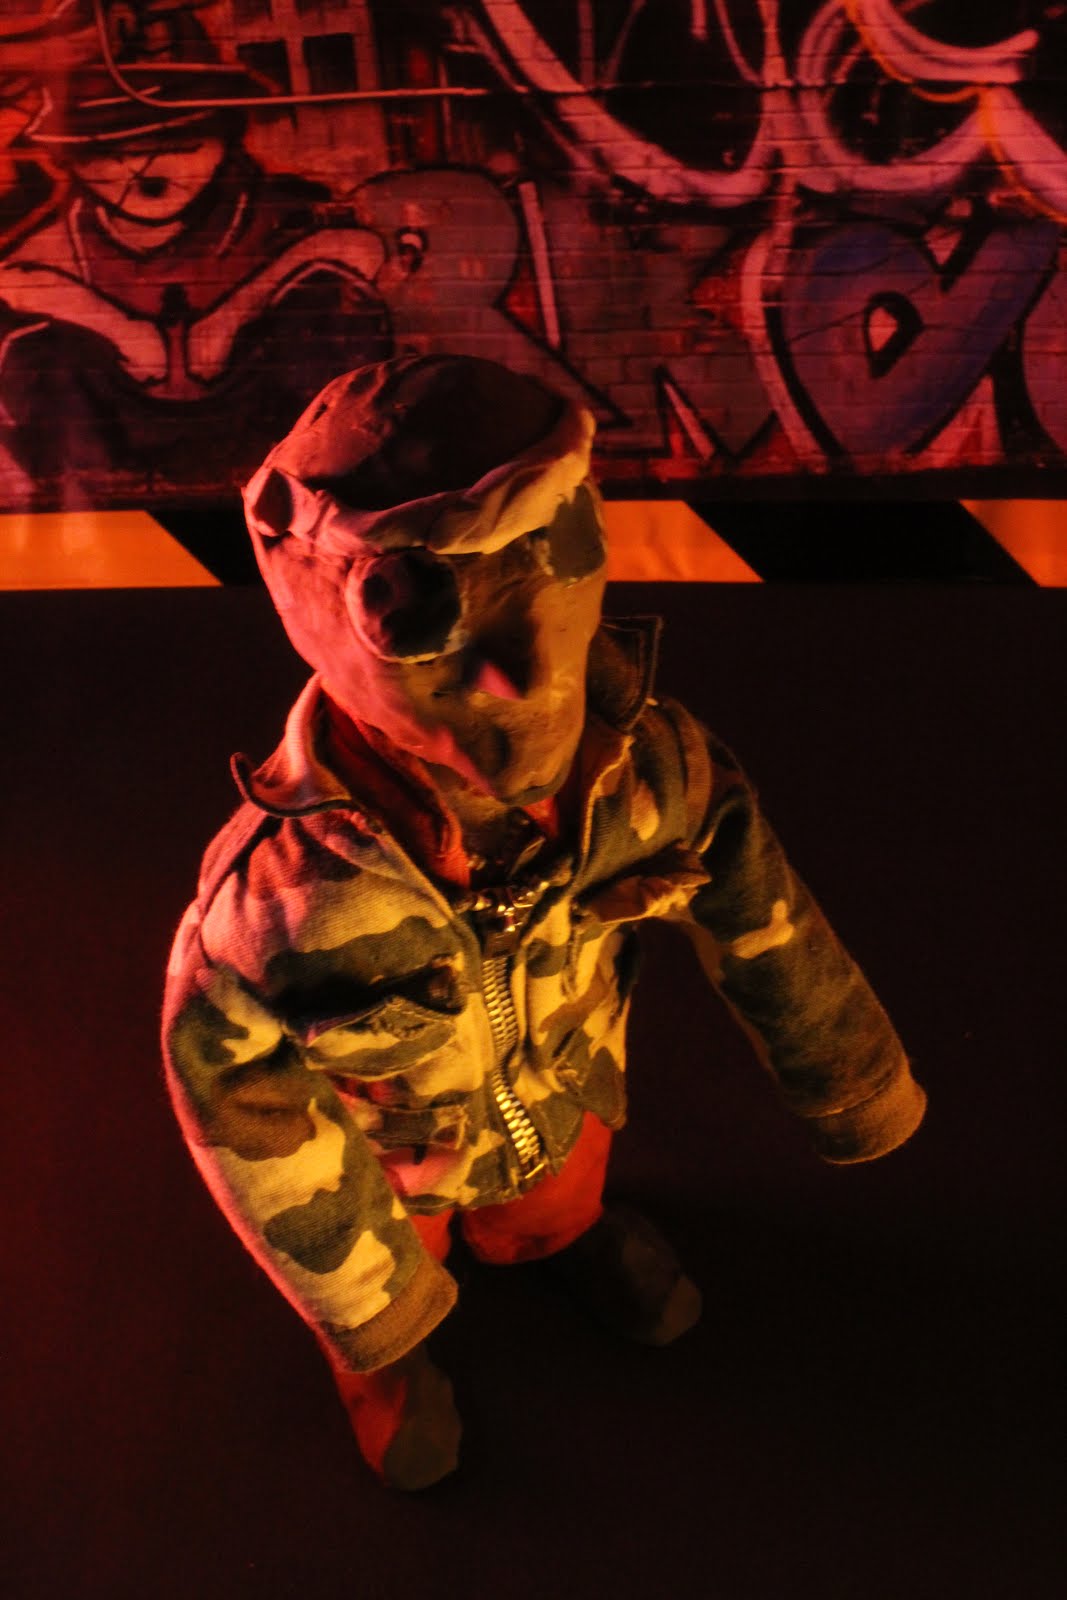


Akram, Daniel, Titus, Oscar, Dante, Courtney.
Task 1: Use creative lighting, backdrops and poses to photograph characters inline with your storyboard.
Task 2: Use Vinci or PS filters on the Ipad to give your images a consistent comic book style
The link below contains examples of the imagery that could be achieved with your character models..
https://drive.google.com/open?id=19MHjCwKtca0YeqN0tZd1WMekzvQkCdYa
Chris, Dior, Nathan, Ze, Adam
Task 1: Collect your research and ideas together into a 'Creative Treatment' presentation.
Monday, 20 November 2017
Group B (With Jane) Individual Project Development Tasks
Learning Objective:
Be able to produce original imagery in response to a brief.
Yoonis:
Task 1: Complete your planned shoot of the post-16 vocals session
Task 2: Back up your shoot on your G-drive.
Joely:
Task 1: Identify your strongest images of each shoot completed to date and copy this to a 'finals' folder on your G-drive.
Task 2: Ensure that contact sheets and brief notes for each shoot completed do far are on your blog.
Task 3: Complete risk assessments for at least two shoots (ask Jane)
Brandon:
Hand in your assignment 1 power point by emailing it to Jane.
Task: Continue work on the panels of your comic book.
Dante & Courtney:
Task 1: Complete your storyboard.
Task 2: Collect background imagery needed for your comic (ensure images are at least 1500 pixels wide). Place this in a folder on your G-drive and share it to Jane for printing.
Oscar:
Hand in your assignment 1 power point by emailing it to Jane.
Task 1: Roughly sketch out a storyboard of your narrative. If necessary add notes explaining background imagery, shot types, dialogue etc.
Ext: Collect background imagery needed for your comic (ensure images are at least 1500 pixels wide). Place this in a folder on your G-drive and share it to Jane for printing.
Group A (With Mark) Individual Project Development Tasks
Learning Objective:
Be able to ideas and designs for Graphic Narrative.
Titus
- Task 1: Use the resources provided in your box to complete your characters. Photograph these final stages of construction as evidence of the process.
- Task 2: Find suitable background images online and save these to your G-drive) send a link to me for printing.
Daniel:
- Task 1: Use the resources provided in your box to complete your characters. Photograph these final stages of construction as evidence of the process.
- Task 2: Find suitable background images online and save these to your G-drive) send a link to me for printing.
Akram:
- Task 1: Write a bullet point list of the action within your narrative.
- Task 2: Use the printed template to sketch out each point in your list will be shot.
- Advice: It is fine to use stick figures / a simple style within your storyboard. The aim is to think about the poses that the character(s) will be in, the background that will be used and the camera angle - eg close up, long shot etc.
- https://www.amazon.co.uk/Death-Rap-Tupac-Shakur-Life/dp/1844497275
- http://www.beddoart.com/new-beddo-art-exclusive-piece-tupac-days-of-future-past/
Zeeshan:
- Task 1: Use the notes from last week to complete your market research into sc-fi & conspiracy theory based comic books.
- Task 2: Brain storm ideas for your own Graphic narrative on this theme.
- Ext: Write a short (single paragraph) description of your strongest idea.
- https://www.amazon.com/Roswell-Conspiracies-Aliens-Myths-Legends/dp/B000NLA9TS
- http://www.superherohype.com/news/179843-x-files-to-crossover-with-transformers-the-crow-tmnt-and-ghostbusters-in-new-comic-event
- https://www.flickeringmyth.com/2013/09/comic-book-review-x-files-season-10-4/
Chris:
- Task 1: Use the notes from last week to complete your market research into comic books featuring animal characters, and themes of gang/prison conflicts.
- Task 2: Brain storm ideas for your own Graphic narrative on this theme.
- Ext: Write a short (single paragraph) description of your strongest idea.
- Have a look at:
- https://en.wikipedia.org/wiki/Beasts_of_Burden
- https://www.amazon.co.uk/Carnal-Pride-Lions-John-Connell/dp/0983613168
- https://en.wikipedia.org/wiki/Animal_Man
- https://en.wikipedia.org/wiki/The_Wolf_Among_Us
Riel & Nathan:
- Task 1: Use the notes from last week to complete your market research into comic books focused on music culture. (Remember to look at the Digi Arts blog as there are lots of links to articles posted there you just have to scroll down).
- Task 2: Brain storm ideas for your own Graphic narrative on this theme.
- Ext: Write a short (single paragraph) description of your strongest idea.
- http://daily.redbullmusicacademy.com/2016/05/grime-comic
- http://www.xxlmag.com/news/2013/03/15-rappers-featured-in-comics-book/
- https://www.amazon.com/Hip-Hop-Family-Tree-Book/dp/1606996908
- http://www.billboard.com/photos/6457841/marvel-comics-hip-hop-inspired
Adam, Amir & Dior:
- Task 1: Complete your market research into comic books focused on a theme of your choice. Ask for help if you need ideas about useful search terms. You aim is to collect examples of comic book art and storylines with your chosen theme, and also information about the target audience for each example.You will need at least three examples.
- Task 2: Brain storm ideas for your own Graphic narrative on this theme.
- Ext: Write a short (single paragraph) description of your strongest idea.
Monday, 13 November 2017
Unit 55: Assignment 2 Brief (Producing your graphic narrative piece)
Assignment 2 of this Unit is to produce your
Graphic Narrative piece.
Below is a link to the assignment brief
(it should have also been shared to you)

Monday, 6 November 2017
Digi Arts Group B: Session Targets for Monday 6th November
Brandon, Courtney, Dante, Oscar.
Session Objective: Be able to present your own original ideas for a graphic narrative as a carefully styled slide presentation.(powerpoint / keynote).
Task 1:
Choose a presentation design / template appropriate to your chosen comic book theme and place the elements of your graphic narrative idea into it.
Contents reminder:
- Title page with your name and name of your graphic narrative.
- Storyline page giving details of what the story is about, where it is set and who the main characters are.
- Character design page(s) introducing your visuals for the main characters (you must have some of your own original designs here). This should also include notes explaining your design ideas - why they look the way they do.
- Market research page(s) presenting examples of existing graphic narrative with similar themes or audiences. Plus notes using these examples to explain how these demonstrate audience potential for your own idea.
Task 2:
Use back ground images, fonts etc to echo the style of your graphic narrative idea throughout your presentation. Eye catching presentations are the key way to attract funders / investors for your projects.
Joely, Yoonis
Session Objective: Be able to plan independent shoot work needed for completion of client commission.
Task 1:
On your blog write a short review of the shots that you have successfully achieved so far towards completion of your commission, and list those that you still need to do.
Task 2:
Create shoot plans for the shots which you still need to do. Please share your shoot plans t me before next session.
Digi Arts Group A: Session Targets for Monday 6th November
Titus & Daniel (Working with Izzy):
Session Objective:
Be able to use storyboarding techniques to plan your graphic narrative.
Task 1:
Create a bullet point list of the scenes which make up your story.
ADVICE: Each scene should correspond to a frame of your comic book / graphic novel.
Your bullet point for each scene should explain what 'action' is happening, where it is set and include any 'dialogue' necessary.
Task 2:
Begin to plan out the character positions and camera angles and which you will use for each scene within a storyboard template.
ADVICE: It is fine to use simple stick figure drawing for this if you want to. The aim is to think clearly about the shots needed to tell the story in an exciting way.
Akram, Aden, Christopher, Amir, Riel, Adam
(Working with Mark).
Session Objective:
Be able to generate ideas for your own original 'Graphic Narrative".
Task 1:
Take part in a short group discussion of Graphic Narrative examples and key terms.
(Key terms: Graphic Narrative, Comic Book, Graphic Novel, Children's Book, Audience, Characters, Protagonist, Antagonist)
Task 2:
Using physical examples and those on the Digi arts blog to inspire you, create a brain-storm of potential story topics for your own graphic narrative.
Ext: Add ideas about characters and audiences to your favourite story topic ideas.
ADVICE: Produce your brain-storm as a word / powerpoint or google doc and share it to both Digi Arts tutors at the end of the session. ( mark.anthony.brown@wac.co.uk jane.maxwell@wac.co.uk )


LINKS TO INSPRINIG EXAMPLES ON THE DIGIARTS BLOG:


Post 16 Digi Arts Groups
Welcome back Artists :) for the rest of the term we will be working in the same two groups as you do for Music and Film. Just in case you are not sure which group you are in see below:
Group A
Tutor: Mark
Room: Video Tech
Titus
Daniel
Akram
Aden
Group B
Tutor: Jane
Rooms: Classroom (Next door to the town room)
Joely
Yoonis
Brandon
Courtney
Dante
Oscar
Group A
Tutor: Mark
Room: Video Tech
Titus
Daniel
Akram
Aden
Christopher
Amir
Riel
Adam
Group B
Tutor: Jane
Rooms: Classroom (Next door to the town room)
Joely
Yoonis
Brandon
Courtney
Dante
Oscar
Subscribe to:
Posts (Atom)