Pages

Monday, 4 December 2017

Producing & refining your imagery

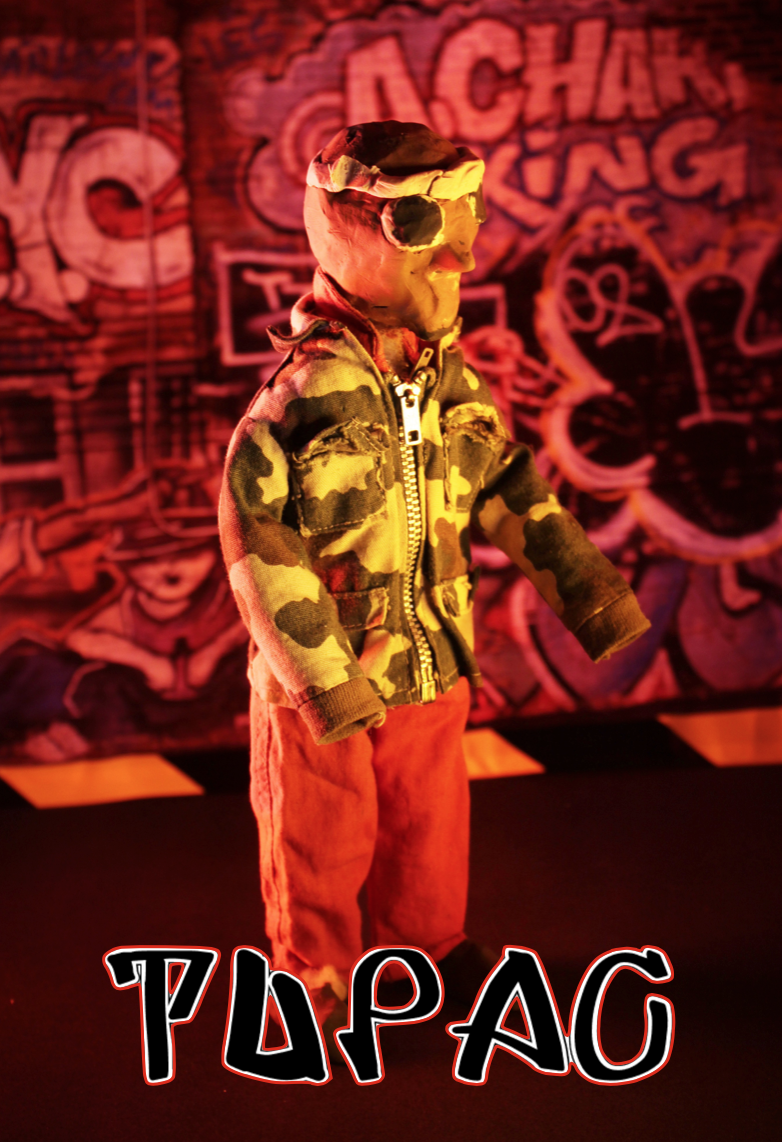
Well done for some excellent character design 
& photography work today :)

Once you have photographed the scenes of your storyboard you can add further comic book styling to your images if you want to using the Vinci or Photoshop filters on the Ipads.

To do this, sign in to your drive, save your images to the camera roll then open up the either of these apps and try applying different filters. When you find one that suits your theme and target audience you can then apply this to all your imagery.

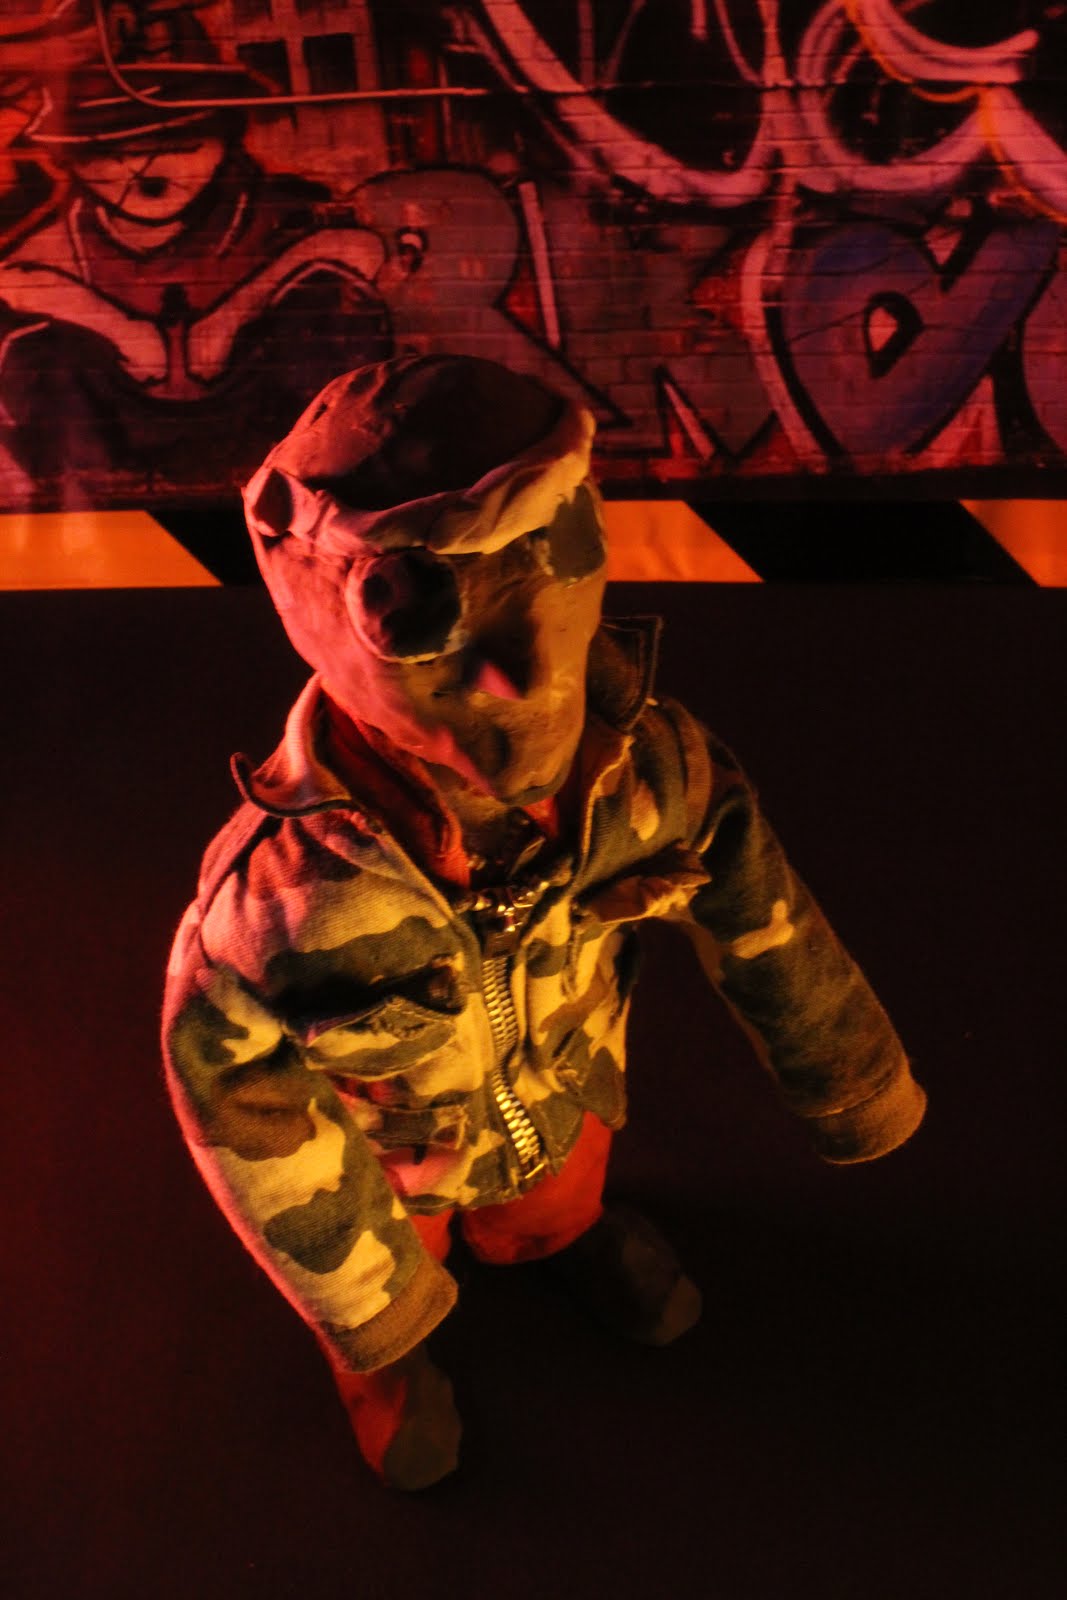
Using apps is a design choice so thin carefully about it, can hep to further blend the 3D character with the printed background... below are some examples of your images treated with different Vinci filters


Left: "hellgun" / Right: "blood"


Left: "transverse" / Right "times"


Left: "mars" / Right: "Vendetta"
Project Development Tasks

Akram, Daniel, Titus, Courtney, Oscar, Dante.

Use careful lighting and character placement to photograph your characters against the printed backgrounds as planned out on your storyboard. Think carefully about angles and shot types e.g close up/mid shot/long shot - from above/below/straight on etc... Below are some examples of Akram's character shot from different angles..


Chris, Ze, Dior, Adam

Task 1: Collect together the ideas and research that you have produced for Assignment 1 into a PowerPoint / Keynote 'Creative Treatment'. A 'Creative Treatment' is a carefully styled presentation which is used in industry to pitch an idea to potential funders.

Below is a link to an example of a Creative Treatment for an animation from a past student. This is just to give you an idea of the way in which the presentation should be given a style throughout which reflects the theme. For example, you could use images or textures from the kinds on locations that you narrative will be set in as backgrounds. Think carefully about your choices of colours and fonts to fit your theme - your logotype (produced for task 1) can be used on the front slide and also those about character design.

Link to past student's Creative Treatment example

Task 2:
Begin work on a character model - you will photograph this against a suitable background to create character design imagery for your [presentation. 

Tuesday, 28 November 2017

Wednesday 28th : Preparation for sharing & project finalisation.

Year 1 - ALL - Quick Design Task

Task 1: Using free front site "www.dafont.com" create a logotype for your Graphic Narrative. This will enable you to add another element to the design part of your presentation for Assignment 1 and also to go beyond the limited font options within the Comic Life layout program when you come to put your narrative togther.

HOW TO:
First, use the search box in the top righthand corner of the site to search for fonts using keywords such as "zombie" or "Hip Hop" or visual terms such as "bubble writing".
Next, type the title of your Graphic Narrative "Zombie Land" into the 'preview' box, set the size to 'large' and click 'submit'.
Finally, screen grab (cmd/shift/4) any that you like and use this asset within yourAssignment 1 presentation and also Graphic Narrative layout.


Below are a some examples applied to photos of your characters. 
(I've used the 'Instant Alpha' function in keynote to remove the white background and given the image a coloured border to make it stand out. You could also easily remove the background and re-colour the font in PS)


Project Development Tasks

Akram, Daniel, Titus, Courtney, Oscar, Dante.

Task 2a: Find, resize and print backgrounds needed to photograph the frames planned out on your storyboard.

Easy guide to resizing your images to use as backgrounds.

Task 2b: Use careful lighting and character placement to photograph your characters against the printed backgrounds as planned out on your storyboard. Think carefully about angles and shot types e.g close up/mid shot/long shot - from above/below/straight on etc... Below are some examples of Akram's character shot from different angles..


Chris, Ze, Dior, Adam

Task 2: Collect together the ideas and research that you have produced for Assignment 1 into a PowerPoint / Keynote 'Creative Treatment'. A 'Creative Treatment' is a carefully styled presentation which is used in industry to pitch an idea to potential funders.

Below is a link to an example of a Creative Treatment for an animation from a past student. This is just to give you an idea of the way in which the presentation should be given a style throughout which reflects the theme. For example, you could use images or textures from the kinds on locations that you narrative will be set in as backgrounds. Think carefully about your choices of colours and fonts to fit your theme - your logotype (produced for task 1) can be used on the front slide and also those about character design.

Link to past student's Creative Treatment example


Monday, 27 November 2017

Monday 27th Project Finalisation Workshop: Groups A & B


Akram, Daniel, Titus, Oscar, Dante, Courtney.

Task 1: Use creative lighting, backdrops and poses to photograph characters inline with your storyboard.

Task 2: Use Vinci or PS filters on the Ipad to give your images a consistent comic book style

The link below contains examples of the imagery that could be achieved with your character models..

https://drive.google.com/open?id=19MHjCwKtca0YeqN0tZd1WMekzvQkCdYa

Chris, Dior, Nathan, Ze, Adam

Task 1: Collect your research and ideas together into a 'Creative Treatment' presentation.


Monday, 20 November 2017

Group B (With Jane) Individual Project Development Tasks

Learning Objective: 
Be able to produce original imagery in response to a brief.

Yoonis: 
Task 1: Complete your planned shoot of the post-16 vocals session
Task 2: Back up your shoot on your G-drive.

Joely:
Task 1: Identify your strongest images of each shoot completed to date and copy this to a 'finals' folder on your G-drive.
Task 2: Ensure that contact sheets and brief notes for each shoot completed do far are on your blog.
Task 3: Complete risk assessments for at least two shoots (ask Jane)

Brandon:
Hand in your assignment 1 power point by emailing it to Jane.
Task: Continue work on the panels of your comic book.

Dante & Courtney: 
Task 1: Complete your storyboard.
Task 2: Collect background imagery needed for your comic (ensure images are at least 1500 pixels wide). Place this in a folder on your G-drive and share it to Jane for printing.

Oscar:
Hand in your assignment 1 power point by emailing it to Jane.
Task 1: Roughly sketch out a storyboard of your narrative. If necessary add notes explaining background imagery, shot types, dialogue etc.
Ext: Collect background imagery needed for your comic (ensure images are at least 1500 pixels wide). Place this in a folder on your G-drive and share it to Jane for printing.


Group A (With Mark) Individual Project Development Tasks

Learning Objective: 
Be able to ideas and designs for Graphic Narrative.

Titus

  • Task 1: Use the resources provided in your box to complete your characters. Photograph these final stages of construction as evidence of the process.
  • Task 2: Find suitable background images online and save these to your G-drive) send a link to me for printing.


Daniel:

  • Task 1: Use the resources provided in your box to complete your characters. Photograph these final stages of construction as evidence of the process.
  • Task 2: Find suitable background images online and save these to your G-drive) send a link to me for printing.


Akram:


Zeeshan:


Chris:


Riel & Nathan:


Adam, Amir & Dior:

  • Task 1: Complete your market research into comic books focused on a theme of your choice. Ask for help if you need ideas about useful search terms. You aim is to collect examples of comic book art and storylines with your chosen theme, and also information about the target audience for each example.You will need at least three examples.
  • Task 2: Brain storm ideas for your own Graphic narrative on this theme.
  • Ext: Write a short (single paragraph) description of your strongest idea.


Monday, 13 November 2017

Unit 55: Assignment 2 Brief (Producing your graphic narrative piece)

Assignment 2 of this Unit is to produce your 
Graphic Narrative piece.

Below is a link to the assignment brief 
(it should have also been shared to you)


Monday, 6 November 2017

Digi Arts Group B: Session Targets for Monday 6th November

Brandon, Courtney, Dante, Oscar.

Session Objective: Be able to present your own original ideas for a graphic narrative as a carefully styled slide presentation.(powerpoint / keynote).

Task 1
Choose a presentation design / template appropriate to your chosen comic book theme and place the elements of your graphic narrative idea into it.

Contents reminder:

  • Title page with your name and name of your graphic narrative.
  • Storyline page giving details of what the story is about, where it is set and who the main characters are.
  • Character design page(s) introducing your visuals for the main characters (you must have some of your own original designs here). This should also include notes explaining your design ideas - why they look the way they do.
  • Market research page(s) presenting examples of existing graphic narrative with similar themes or audiences. Plus notes using these examples to explain how these demonstrate audience potential for your own idea.
Task 2: 
Use back ground images, fonts etc to echo the style of your graphic narrative idea throughout your presentation. Eye catching presentations are the key way to attract funders / investors for your projects.

Joely, Yoonis

Session Objective: Be able to plan independent shoot work needed for completion of client commission.

Task 1: 
On your blog write a short review of the shots that you have successfully achieved so far towards completion of your commission, and list those that you still need to do.

Task 2: 
Create shoot plans for the shots which you still need to do. Please share your shoot plans t me before next session.


Digi Arts Group A: Session Targets for Monday 6th November


Titus & Daniel (Working with Izzy): 

Session Objective:
Be able to use storyboarding techniques to plan your graphic narrative.

Task 1: 
Create a bullet point list of the scenes which make up your story.

ADVICE: Each scene should correspond to a frame of your comic book / graphic novel.
Your bullet point for each scene should explain what 'action' is happening, where it is set and include any 'dialogue' necessary.

Task 2:
Begin to plan out the character positions  and camera angles and which you will use for each scene within a storyboard template.

ADVICE: It is fine to use simple stick figure drawing for this if you want to. The aim is to think clearly about the shots needed to tell the story in an exciting way.

Akram, Aden, Christopher, Amir, Riel, Adam 
(Working with Mark).

Session Objective: 
Be able to generate ideas for your own original 'Graphic Narrative".

Task 1:
Take part in a short group discussion of Graphic Narrative examples and key terms.
(Key terms: Graphic Narrative, Comic Book, Graphic Novel, Children's Book, Audience,  Characters, Protagonist, Antagonist)

Task 2:
Using physical examples and those on the Digi arts blog to inspire you, create a brain-storm of potential story topics for your own graphic narrative.

Ext: Add ideas about characters and audiences to your favourite story topic ideas.

ADVICE: Produce your brain-storm as a word / powerpoint or google doc and share it to both Digi Arts tutors at the end of the session.  ( mark.anthony.brown@wac.co.uk   jane.maxwell@wac.co.uk )

LINKS TO INSPRINIG EXAMPLES ON THE DIGIARTS BLOG:


Post 16 Digi Arts Groups

Welcome back Artists :) for the rest of the term we will  be working in the same two groups as you do for Music and Film. Just in case you are not sure which group you are in see below:

Group A 
Tutor: Mark
Room: Video Tech
Titus
Daniel
Akram
Aden
Christopher 
Amir 
Riel 
Adam 

Group B
Tutor: Jane
Rooms: Classroom (Next door to the town room)
Joely
Yoonis
Brandon
Courtney
Dante
Oscar